Personal cybersecurity: what are the threats we need to protect ourselves from?

When we talk about cybersecurity, we tend to focus on the interests of businesses, governments, or other organizations. But what about our personal lives, are we at risk from cyber attacks? We definitely are, and we don’t talk enough about it. When people ask cybersecurity experts about what they should do to protect themselves, the answer is often “it depends on your threat model”. This is not false, but also not very helpful. Most people don’t relate to terminology such as threat models, and they have likely never given it much thought. This article is really meant for professionals who need to have discussions with individuals about security, to provide a realistic starting point for the risks we face as individuals, rather than companies.

Old lady scammed on phone. What was her threat model?

A threat model is simply a description of the attacks you should expect to be a target of. A good threat model gives you an understanding of:

  • Who is the attacker (at least a category)
  • What is the motivation of the attacker
  • What will the attacker likely do?

Let’s summarize some typical attacks in a table, and then discuss how we can better protect ourselves, or help friends and family protect their digital lives. This is not intended for people who are being targeted by intelligence agencies or professional spies: it is a description of threats that can hit anyone with a digital life.

AttackFriends, relatives and service personsCriminals on the Internet
Identity theftTheft of banking ID used to steal money.

Signing agreements on behalf of the victim (credit/loans)
User account takeover, and banking ID theft if possible.
Spyware on phone or computerJealous partners wanting to track your activities, including physical location.Criminals wanting to steal banking credentials or credit card data.
Data theftTheft of photos, or they may also take the photos and abuse them later for extortion.Exfiltration of personal data, especially photos. Primary motivation is extortion.
Credit card fraudUse of stored credit card data in web browserPhishing with the aim to steal credit card information.

Hacked web pages, where credit card data is stolen.
Cyber extortionThreats to release private pictures, or sending them to friends and relatives. Less common among people who know each other from before. Direct threats, typically related to porn habits they claim to have evidence of (in 99% of the cases these are empty threats).

Threats about sending stolen pictures to relatives or releasing them on the Internet (more realistic threats).

Threats to reveal compromising information to employer or spouse, for blackmail.
MalwareMostly spyware, but also remote access tools to allow remote control of a computer can be used be jealous partners. Ransomware can still hit individuals, but less attractive as targets for criminals.

Malware can be used as a stepping stone to attack corporate networks.
Network attackNot relevantCriminals attacking vulnerable routers exposed to the Internet, making them part of a global botnet.
Typical attacks we should consider for our personal threat models

Identity theft

Identity theft is a big problem, and is costing individuals large sums of money every year. Particularly the elderly are vulnerable to dishonest relatives and service persons, but this can also happen with younger people. The attacker will then:

  • Attempt to steal one-time code dongles, still used by many banks. They may also just use them when not seen by the owner, to avoid causing suspicion.
  • Use of a phone app on a borrowed phone to confirm transactions
  • Ask for the password to such services with the excuse of being helpful. They may also be given the password to perform online banking on behalf of an elderly person.

The typical result of this type of attack, is that the attacker will transfer money from the victim’s account to their own account. They may also take out a loan, and then transfer the money. Often the loss will not be covered by insurance, because giving access to passwords and access codes is seen as negligence from the victim.

The obvious defense here is to not give out passwords or allow other people to control your bank account. For elderly who need this, access can be delegated by the bank, allowing the helper to use their own identity to perform this work. That is a strong deterrent if the helper is the criminal, as it would be traceable who is performing the transactions. That would also remove the negligence argument from the insurance company, increasing the chance of getting the money back.

For criminals from the Internet, account take-over most often occurs as a phishing attack. The target these days is typically banking details. Common sense cyber hygiene can help, but we all know that people are not always that vigilant. Because of this, it is a good idea to use security products and services to block phishing links. This is not a 100% effective protection but it will remove many threats. If your ISP offers a DNS based filtering service that uses threat intelligence to block threats, turn it on. Alternatively, you may want to set up a similar local service if you don’t trust the ISP. In addition, installing a security product with “safe browsing” features will help block known phishing links. This defense should also be considered for smartphones, as most people surf the Internet more from their phones than computers when at home.

Spyware on phone or computer

Spyware is often used by jealous and abusive partners. If you are in a relationship like this, the best course of action is obviously to leave. But even if you do, you would not like the ex to have control over your phone and computer. There are 3 categories of abusive ex trackers to think about:

  • Joint user accounts that allow tracking the other person. This can be smartphone apps linked to your car, allowing the other person to track your position, it could be shared access to cloud file storage such as OneDrive or Dropbox, and shared calendars. This can also be family sharing features on iPhone and Android phones, that allow tracking location.
  • Directly shared passwords. Many partners will share their passwords and pin codes because they trust each other and it is convenient. Others share such details due to social control and negative pressure. In a conflict situation this will be dangerous, and important to get out of as soon as it is safe to do so.
  • Actual spyware being installed, often called stalkerware (wikipedia) that allows the attacker to read text messages, track location, etc.

The two first bullet points are the most difficult. We never want to believe that our closest family and partners would abuse trust given to them, but fact is they often do. The best defense here is to be very selective with what is shared, and wherever possible use sharing features that can be turned off instead of sharing a user account.

For the spyware case, security software can be effective in detecting and removing the spyware. In addition, such spyware tends to drain the battery fast because it is always active in the background. Check for apps with high battery usage. Spyware will often masquerade as legitimate apps. If you have apps with an unreasonable number of permissions, this is also a good reason to take a closer look at it, and remove it if you do not know why it needs those permissions.

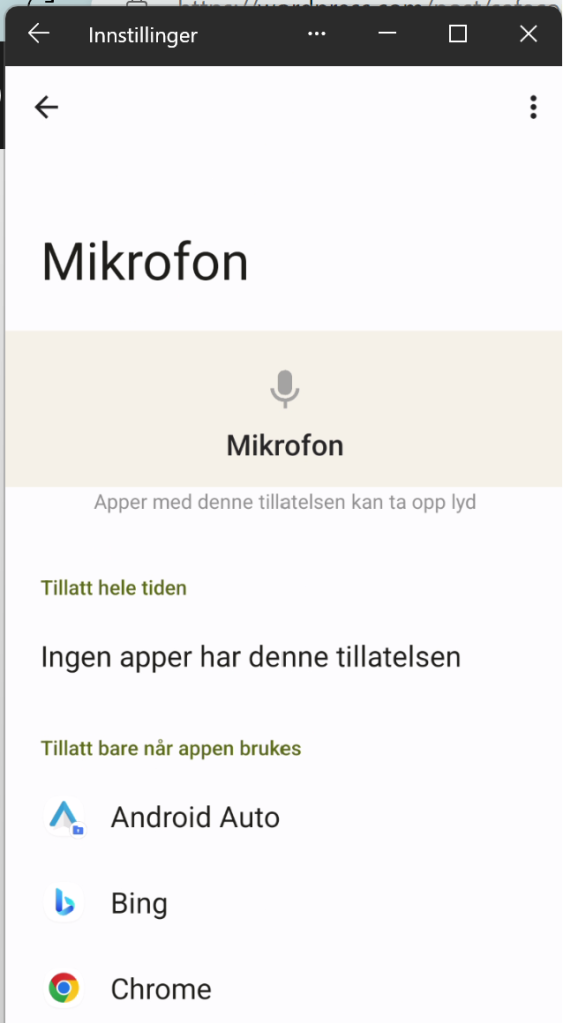
It is therefore a good idea to regularly go through app permissions to make sure you have not granted apps unreasonable access. The permissions that can be granted to apps on smartphones can be quite granular. Spyware will typically want to have access to your calendar, contacts, location, microphone, photos and videos, phone log, and your text messages. If an app asks for any of that without any real reason to do so, be careful.

The last piece of defense here would be to keep your phone up-to-date. Not only does this help avoid exploitation of vulnerable software, it will also make sure you have the latest built-in security features your phone’s operating system has to offer.

Data theft

For companies, data theft is either about intellectual property, or it is details the company don’t want to be public, that will be abused in extortion schemes. For individuals, it is mostly about extortion, and very ofte private photos. To reduce the risk of theft of your most personal files, it is a good idea to take some extra steps to protect them.

If you use cloud accounts to save your files, several providers offer a vault with extra protection for your most sensitive data. For example, OneDrive offers a Personal Vault, which enforces MFA, has extra restrictions on sharing, and avoids saving local unprotected copies on disk when you access the files. Dropbox also has a Vault feature with similar features.

Many users who have gotten personal files stolen, have experienced this from Snapchat or other social media accounts. Such accounts should be secured with multi-factor authentication. If you have shared very personal photos or files through social media accounts, it is also good to use time-expiring links, as well as preferring secure messaging services if possible. Signal is a good solution.

Credit card fraud

Credit card fraud is common, both from relatives and service persons, as well as from criminals on the Internet. The people with local access to your cards, can steal the physical card, or use card data stored on your computer. Make sure to only store data in secure locations, such as a password manager, or a vault that requires strong authentication to access. Storing credit card data in text files or spreadsheets is very risky.

It can be a good idea to use credit cards when paying for things online. This way, your bank account cannot be directly drained by criminals, and you can report the fraudulent transactions to your bank quickly. Make it a habit to review all transactions before paying the bill, and contact your bank immediately if you see unknown transactions. Note that many criminals will use a series of smaller transactions instead of one big one, to avoid easy discovery or raising red flags in automated fraud detection systems.

Cyber extortion

Both criminals and people close to you may use real or fake data to try to blackmail you. A common type of online fraud here, is porn related extortion. A phishing e-mail is sent to you, claiming to have video of you enjoying some adult content, that they will release to the public, or to your friends, if you do not pay them money. This is a scary enough threat for people that many will pay up, even if they know very well that there is no way for the criminals to have such videos of them. Knowing that this is a common scare tactic and fraud, can help people ignore such threats without causing unnecessary anxiety.

Another type of extortion is based on photos. The risk of getting photos stolen is of course lower if you have taken precautions, but there is no way to be completely secure. Of course, other people may also have taken pictures, or even generated them using AI tools or photo editing. In this case, you might experience that the photos are actually published or shared. If this happens, having a plan to cope with it is good. It should also be reported to the police.

Any blackmail attempts should be reported to the police.

Malware

Malware is any kind of software created for evil purposes, such as data theft, remote controlling a computer, or using your computer as a bot to attack others. You computer in this case can be any of your Internet connected devices, such as your PC, your Wi-Fi router, your smartphone, your connected EV, or even your washing machine.

Most malware is spread through e-mail and social media chats. Being careful with messages is a good starting point. Further, keeping computers and equipment up to date, and running antivirus software where possible is a good way to protect oneself from malware.

Network attack

Criminals on the Internet will run automated attacks on routers. Avoid exposing management ports to the Internet to reduce the risk of this. When a vulnerability that can be exploited automatically is made known, network devices are common targeted in mass exploitation attacks, quickly compromising a large number of devices. This can then be used to attack other companies, or your own workplace. To avoid this, make sure the network devices at home are patched as soon as possible when updates are published.

You can still be hacked

If you consider your threat model, and you make reasonable attempts to be more secure like discussed above, you considerably reduce your risk from cyber attacks, whether they are family member insider threats or bad guys on the Internet. Doing so will, however, not make you invulnerable. You can still get hacked. Because of this, it is also a good idea to have a personal incident response plan. We won’t dive into a detailed story on that, but we should all consider the following:

  • What should I have offline backups of, for example on a USB drive, in case all online data is lost/destroyed?
  • Who do I need to call if my accounts are compromised? Make a list of your most important contact points for banks, people you frequently interact with, your insurance company, and perhaps others that can help or will need to know.
  • Keep some offline emergency resources, such as cash, a notebook with contact information, and perhaps a dumb phone with an extra SIM card

Having all of this in place is the digital equivalent of having smoke detectors and fire extinguishers in your home. It can make a very bad day somewhat less bad. And that has a lot of value in the moment.

Get Ubuntu vulnerability scans to work on Wazuh 4.7.0

Currently, if you install Wazuh using the quickstart script, vulnerability detection will not work for Ubuntu. The reason is a change in the format of vulnerability feeds from Canonical. This is being fixed for the 4.7.8 release of Wazuh, as detailed here: https://github.com/wazuh/wazuh/issues/20573.

To make it work for 4.7.0, you can use the recipe in the same Github issue:

  • Download definition files locally.
  • Unarchive the downloaded bz2 files
  • Remove the first line in the XML file
  • Change ownership of files to wazuh if not downloded with this account
  • You can set up a cron job for this to make sure you have fresh vulnerability data.

In addition, you need to configure the ossec.conf file to use the local definition files for Canonical feeds.

Also, if the agent is installed in the newest version of Ubuntu (Mantic), you need to add the correct feed for this version, and then update the ossec.conf file to use it.

How vulnerable do you want to be?

Vulnerability management is important if you want to make life difficult for hackers. This is a follow-up of a LinkedIn post I wrote a few weeks ago (Dare to be vulnerable!) with a few more details.

Vulnerabilities are necessary for attacks to be successful. The vulnerability does not need to be a software flaw, it can also be a configuration error, or an error in the way the technology is used. When we want to reduce vulnerability exposure, we should take into account that we need to cover:

  1. Software vulnerabilities (typically published as CVE’s)
  2. Software configuration errors (can be really hard to identify)
  3. Deviations from acceptable use or intended workflows
  4. Errors in workflow design that are exploitable by attackers

A vulnerability management process will typically consist of:

  1. Discovery
  2. Analysis and prioritization
  3. Remediation planning
  4. Remediation deployment
  5. Verification

Software vulnerabilities are the easiest part to perform this on, because they can be largely discovered and remediated automatically. By using automatic software updates, steps b-d in the vulnerability management process can be taken care of. If your software is always up to date, the vulnerability discovery function becomes an auditing function, used to check that patching is happening.

Create a practical policy

Sometimes, vulnerabilities exist that cannot be fixed automatically, or automation errors prevent updates from occurring. In these situations, we need to evaluate how much risk these vulnerabilities pose to our system. Because we need this evaluation to work on a large scale, we cannot depend on a manual risk evaluation for each vulnerability. Some programs will use the CVSS score for prioritization and say that everything marked as CRITICAL (e.g. CVSS > 8) needs to be patched right away. However, this may not match the business risk well – a lower scored vulnerability in a more critical system can pose a greater threat to core business processes. That is why it is useful to classify all devices by their criticality for vulnerability management. Then we can create a guidance table like this (this is just an example – every organization should make their own guidance based on their risk tolerance).

CVSS (Severity)Asset criticality LOWAsset criticality MEDIUMAsset criticality HIGH
> 7.5 (HIgh or Critical)30 days1 weekASAP
4.5 – 7.5 (Medium)90 days30 days1 week
< 4.5 (Low)90 days30 days30 days
Possible vulnerability prioritization scheme

A critical element for managing this in practice is a good discovery function. There are many vulnerability management systems with this functionality, as well as various vulnerability scanners. For managing a network, we can use Wazuh, which has a built-in vulnerability discovery function. The software unfortunately does not support direct prioritization and enrichment in the default vulnerability dashboard, but it can export reports as CSV files for processing elsewhere, or we can create custom dashboards. Here’s how the default dashboard for a single agent looks.

wazuh dashboard

Let’s consider the criticality of the device first:

  • Normal employee laptop – with access to busines systems: MEDIUM
  • LOW criticality – computer used as a guest machine only on the guest network
  • HIGH criticality – the computer is a dedicated administrator workstation

The normal patch cycle is patch every 14 days. What we need to decice, is if we need to do anything outside of the normal patch cycle. First, consider a the administrator workstation, which has HIGH criticality. Do we have any vulnerabilities with higher CVSS score than 7.5?

We have 24 vulnerabilities matching HIGH or CRITICAL severity – indicating we need to take immediate action. If the computer had been a low criticality machine we would not have to do anything extra to patch (policy is to patch within 30 days, and we run bi-weekly patches in this example). For a MEDIUM case, we would need to patch if it is more than one week until the next planned patching operation.

React to changes in the threat landscape

Sometimes there are news that threat actors are actively exploiting a given vulnerability, or that there is a vulnerability without a patch being exploited. For such cases, the regular vulnerability management and patch management processes are not sufficient, especially not if we are subject to mass exploitation cases. There have been a few examples of this in 2023, such as

Of course, the bug that was two years old should have been patched already, but if you have not already done so, when news like this hits, it is important to take action. For a zeroday, or a very new vulnerability being exploited, you may not have had time to patch within the normal cycle yet. For example, on 25 April this year Zyxel issued a patch for vulnerability CVE-2023-28771, and on 11 May threat actors exploited this to attack multiple critical infrastructure sites in Denmark (see https://sektorcert.dk/wp-content/uploads/2023/11/SektorCERT-The-attack-against-Danish-critical-infrastructure-TLP-CLEAR.pdf for details).

Because of this, the prioritization needs to be extended to take current threat intelligence into account. Are there events that increase the risk significantly for a company, or for exploitation of a given set of vulnerabilities, extra risk mitigation should be established. This can be patching, but it can also be temporarily reducing exposure, or even shutting down a service temporarily to avoid compromise. To make this work, you will need to track what is going on. A good start is to monitor security news feeds, social media and threat intelligence feeds for important information, in addition to bulletins from vendors.

Here’s a suggested way to keep track of all that in a relatively manual way: create a specific social media list, or an RSS feed that you check regularly. When there are events of particular interest, such as a vulnerability being used by ransomware groups, or something similar, check your inventory if you have any of that equipment or software in your network. When you do, take action based on the risk exposure and risk acceptance criteria you operate with. For example, say you have a news headline stating that ransomware gangs are exploiting a bug in the Tor integration in the Brave browser, quickly taking over corporate networks around the globe.

AI generated impression of news about ransomware attacks on browsers

With news like this, it would be a good idea to research which versions are being exploited, and to check the software inventory for installs of this. WIth Wazuh, there is unfortunately no easy way to do this across all agents, because the inventory of each agent is its own sqlite database on the manager. There is a Wazuh API that can be used to loop over all the agents, looking for a particular package. In this case, we are using the Wazuh->Tools->API Console to demo this, searching for “brave” on one agent at the time:

We can also, for each individual agent, check the inventory in the dashboard.

If this story had been real, the next actions would be to check recommended fixes or workarounds from the vendor, or decide on another action to take quickly. In case of mass exploitation, it may also be reasonable to think beyond the single endpoint; protect all endpoints from this exploitation immedaitely to avoid ransomware. In the case of a browser, a likely acceptable way to do this would be to uninstall it from all endpoints until a patch is available, for example.

The key takeway from this little expedition into vulnerability management is that we need to actively manage vulnerability exposure, in addition to having regular patching. Patch fast if the business risk is critical, and if you cannot patch, you need to find other mitigations. That also means, that if you have outsourced IT management, it would be a good idea to talk to your supplier about patching and vulnerability management, and not to just trust that “it will be handled”. In many cases it won’t, unfortunately.

Detecting PowerShell based reverse shells with Wazuh

Inspired by this blog post (Detecting hoaxshell with Wazuh | Wazuh) by the Wazuh team, I decided to look at how easy it would be to create a detection and response tactic for PowerShell based payloads used as droppers or for command and control. Some typical attack patterns we would be interested in detecting:

  • VBA macro à PowerShell command à Download RAT à Install
  • User action or dropper à PowerShell reverse shell

Common to both these PowerShell use cases, is that a PowerShell command connects to a location on the network (internal or Internet). In addition, we may detect obfuscated payloads, such as Base64 encoded scripts.

Wazuh has a number of detection rules by default, but Windows is not logging PowerShell script blocks by default. You can enable these logs using several methods, for example GPO’s, or doing registry edits. Here’s a recipe for turning it on: about Logging – PowerShell | Microsoft Learn. Note that on Windows 11 Home, gpedit.msc is not installed by default, but you can still enable PowerShell auditing using a registry key.

Not all rules in Wazuh are enabled by default. For a list of available PowerShell rules in Wazuh, see the following: wazuh/ruleset/rules/0915-win-powershell_rules.xml at v4.7.0 · wazuh/wazuh · GitHub.

What we want to detect is one of the following:

  1. PowerShell making an outgoing network connection
  2. PowerShell executing a Base64 encoded payload

We found that there is an existing rule for the Base64 encoded payload:

<rule id="91809" level="10">

<if_sid>91802</if_sid>
<field name="win.eventdata.scriptBlockText" type="pcre2">(?i)FromBase64String</field>
<options>no_full_log</options>
<description>Powershell script may be using Base64 decoding method</description>
<mitre>
<id>T1140</id>>
</mitre>
</rule>

We ran this one, and also collected clipboard content using Get-Clipboard, to see that the default rules work.

wazuh dashboard

For the reverse shell, we can check some examples on Online – Reverse Shell Generator (revshells.com), and we see that the PoweShell based examples there use:

New-Object Net.Sockets.TCPClient($host,$port)

Note that all of these reverse shell payloads are automatically blocked by Defender, so if you want to test if Wazuh can detect them you need to turn off defender, or obfuscate them further. Currently we are not trying to be very ambitious, so we only want to detect basic reverse shells without further obfuscation.

There is no rule for this type of reverse shell detection. However, we are collecting PowerShell commands from the client, so we should be able to create a new local rule on the Wazuh manager.

Adding the following rule:

terminal with wazuh rule

We then restart the Wazuh manager with “systemctl restart wazuh-manager”, and now we are ready to try our reverse shell. First, we try without turning off Windows Defender, then we turn it off, and try it again. Then we succeed establishing a reverse shell, and it is immediately visible in Wazuh.

revshell detected

Expanding the alert in Wazuh, we see that the full script block is extracted by the decoder.

scriptblock in wazuh alert

This is very helpful in an incident response situation, also if the payload is obfuscated, as we have a starting point for reversing it and extracting indicators of compromise.

Wazuh has the capability of running active response scripts. These are scripts that are run on a client when a certain rule is triggered. None of these are active by default, but Wazuh ships with a few rules that can be enabled. The default scripts that can be enabled on a Windows endpoint are:

  • Block IP address, either using netsh to block it on the Windows firewall, or using a null route.
  • Restart the Wazuh agent

You also have the capability to create custom response scripts. We could extract the IP address from the PowerShell operational log, or we could kill the PowerShell process itself. Both of these are risky, if we are not very confident that the process is malicious. Of course, when the detection is simply based on the fact that a new TCP connection was created by PowerShell, we have not way of really knowing that. For that we would need a much more specific detection, preferably matching clear indicators of compromise. Wazuh does not have a live response feature, like many commercial EDR products. An alternative approach is to install a remote access tool on each endpoint, allowing the analyst to connect and perform live response on the device itself.

In other words, to perform remote response in this situation, either create more specific detections, or provide a tool to do it manually on the endpoint. But all in all, Wazuh rules are relatively easy to customize, and you can map your own rules towards a threat model. You can also tag the rules you create with the relevant MITRE ATT&CK technique, which brings a bit more context in the Wazuh dashboards.

alert with mitre T1095

After updating the new detection rule with MITRE technique, we get a bit more context into the Wazuh alert. We can then easily use MITRE ATT&CK techniques in threat hunting, and to categorize detections.

mitre attack alerts with level above 10.

Can enterprise security respect privacy?

Privacy receives a lot of attention in public, but within the enterprise it always takes a back seat to security. We seem to be protecting the interests of the corporation by throwing fine masked surveillance net over the employees. There is rarely much discussion or openness about what telemetry companies collect and analyse in the name of security, and how this affects people’s ability to work together, trust each other, and collaborate creatively.

In some corporate environments the creation of a surveillance culture can lead to an almost adversarial relationship between the information security team and the rest of the company. If people feel watched, and treated like threats, they tend to not like the watchers very much.

it security fighting sales people with light sabers (AI generated)

Authenticity, logic and empathy are key factors of trust, according to psychologist Liane Davey being interviewed in HBR podcast HBR On Leadership – Episode 33. Often, one or more of these components are lacking in security communications within the enterprise.

Authenticity can be seen as something one has, when one is clear about the intentions of doing something, and transparent about both viewpoints, and true to one’s values. If an organization talks a lot about inclusion being important, that transparency is a key value, and that respect for individuals are high on the agenda, this may seem quite inauthentic if at the same time people are met with strict security policies, and draconian measures with no reasoning beyond “because of security we need to do X”. This is unfortunately a quite common approach to communications about security, often followed by an excuse to not explain things because secrecy is necessary for everything that has to do with security. If you get in this “us vs. them” situation, you are quite unlikely to be trusted when you do have something to share. In companies like this, people see security as an element of friction, and the security team’s favorite meme is always dumpster fire themed.

The next piece of this puzzle is logic. There is often a form of logic behind security measures. The reason something is done, is usually to stop data breaches, cyber attacks, or insider threats. The goal sometimes seems to be to stop incidents from happening, at any cost. From an isolated point of view, where the security goal is to be as secure as possible, this makes sense. But in the real world, the goal of security should not be to be secure for the sake of some security deity demanding absolute adherrence to IT security policy; it should be to reduce the risk of cyber threats posing an unacceptable risk to the ability of the businss to achieve its mission. And to do that, the business needs people.

The isolated “security deity logic”, let’s call it SDL for short, is at odds with the emptathy pillar of trust. Draconian measures will cause friction in people’s workdays, and a feeling of constant surveillance likely has a number of negative effects on the flow of ideas and the creativity of the organization as a community of colleagues. The conversation is diminished through a feeling of living in a surveillance state. Technical controls often make people go through inconvient processes to get work done. While locking down access to files to only a few people (good practice according to the holy security gods – the least privilege principle) will make it harder for an attacker to steal data, it will also make it harder for other colleagues to find and learn from what has been done in previous projects. By adding a heavy process for vetting software vendors can potentially reduce the risk of a supply-chain attack, it can also drive employees to run their jobs out of personal cloud accounts – just to get things done. If the logic of security architecture is applied in the wrong context (SDL), you end up not taking the needs of people in the organization into account. Because their needs and their logic, that is aligned with the business strategy, are different than the logic of SDL.

What is common in terms of enterprise monitoring?

The typical approach to security today is a 3-step process:

  1. Create rules for what is allowed and what is not.
  2. Lock down technology.
  3. Monitor everything and report any “anomaly” to security team

All of this is actually necessary, but it should be designed with the needs of the business in mind, and not take the SDL approach.

Security monitoring today usually relies on agents on end user machines – socalled EDR or XDR agents. These are antivirus on steroids, with some extra capabilities that resemble a lot of what the actual malware will do, such as controlling the computer remotely. In addition to these agents, the network is typically monitored. This means that everything you do on this network is registered, and can be tied back to the machine used, and the user account used. In addition, with modern cloud services such as Office 365, the activity in these products will often be monitored too.

This monitoring will make a lot of very detailed informaiton avilable to the IT department. Such as:

  • When you logged on, and where you logged on from
  • All programs you are running on your computer, and when
  • All files accessed
  • All links clicked
  • All websites visited
  • All emails and Teams messages sent and received

These tools will normally not break end-to-end encryption, or even TLS (but some do). An nobody is (or should be) actively using this to track what you are doing, like reporting to your boss if you are spending too much time watching cat videos on YouTube instead of logging new leads in the CRM, but the ability to do so is there. Depending on the threat model of the company, all of these measures may be necessary, and they do make it possible to detect actual attacks and stop them before unnecessary harm is done. But: the technology should be used responsibly, and there should be a proportionality of the risk reduction achieved and the impact to privacy it incurs. An above all – there needs to be a certain level of transparency. It is understandable that you don’t want to talk openly about exactly how you monitor your environment, because it would definitely help a targeted attacker. But this does not mean that everything that has to do with security needs to be secret. If you want to look at some examples of data collected for different systems, vendor documentaiton pages would be a good place to start. However, the full privacy impact comes from the combination of multiple tools, and how the data is being used. Here are some links to documentation that shows some of the capabilities that are useful for security, but would also make Felix Dzerzjinskij optimistic about capitalism.

Defender for Endpoint docs (Microsoft)

UEBA explainer (building profiles to find unusual behavior) (Elastic)

Avoiding becoming the KGB

So how can the security team avoid becoming a digital KGB within the enterprise? I think 3 good principles can help us achieve the right balance.

  1. Security is a business support function. Align security goals with company mission and strategy.
  2. Make security architecture balanced. Take the organization’s way of working into account, its risks and risk apetite, and the needs of people working there. Don’t use security deity logic (SDL).
  3. Build trust through authenticity, logic and empathy. Be honest, also when you cannot share all details, use the right context for the logic, and show real empathy for people in other roles in the organiastion.

If we manage to do this, we will get less turf wars, and better alignment of security and business objectives. And who should be responsible for making this happen? That’s clearly a top leadership responsibility.

Azure Arc as persistence technique: stealthier than one would think on Linux servers

The other day I listened to the Microsoft Threat Intelligence Podcast on my way to work (Spotify link). There they mentioned that the threat actor “Peach Sandstorm” had used Azure Arc as a persistence vector, but not giving much detail about how this would work. This rather unusual technique can be a bit hard to spot, especially on Linux hosts, unless you know where to look. The log file /var/opt/azcmagent/log/hidms.log is a good place to start (if it exists and you are not using Azure Arc, you may be in trouble).

I got a bit curious, so I decided to how that would work, and what kind of logs it would generate on the host (without any extra auditing enabled beyond the default server logs).

Arc Agent on Linux Server

For the first test I used a Linux VM running in Google Cloud. Then I used the Azure portal to generate an install script for a single server.

azure arc portal generated script

To install the agent, I ran the script on the VM, and had to authenticate it by pasting a code generated in the terminal in a browser window. After this I was able to to connect to the VM from the Azure portal. Depending on what extension you install, there are multiple options for authenticating, including using Entra ID. I chose not to install anything extra, and added a public key to the VM, and then provided the corresponding private key to the Azure portal, to connect using plain SSH from an Azure Cloud Shell.

authentication options

Detecting this connection is not straightforward, as Azure Arc sets up a proxy. Running the last command will only show a login from ::1, so it is not so easy to see that this is coming from an external attacker. If you try to use netstat to see live connections, it is also not immediately clear:

tcp        0      0 10.132.0.2:22           35.235.240.112:45789    ESTABLISHED 766092/sshd: cyberh
tcp6       0      0 ::1:22                  ::1:36568               ESTABLISHED 766163/sshd: cyberh

The top connection here was from the Google cloud shell, and the bottom one was the Azure Arc logon.

Since Linux logs sudo calls in the /var/log/auth.log file, we can see the installation commands being run:

Oct 23 07:56:33 scadajumper sudo: cyberhakon : TTY=pts/0 ; PWD=/home/cyberhakon ; USER=root ; ENV=DEBIAN_FRONTEND=noninteractive ; COMMAND=/usr/bin/apt install -y azcmagent
Oct 23 07:56:33 scadajumper sudo: pam_unix(sudo:session): session opened for user root(uid=0) by cyberhakon(uid=1000)
Oct 23 07:57:02 scadajumper sudo: cyberhakon : TTY=pts/0 ; PWD=/home/cyberhakon ; USER=root ; COMMAND=/usr/bin/azcmagent connect --resource-group quicktalks --tenant-id adf10e2b-b6e9-41d6-be2f-c12bb566019c --location norwayeast --subscription-id 8a8c2495-4b8c-4282-a028-55a16ef96caa --cloud AzureCloud --correlation-id fc67cc2f-7c66-4506-b2cf-2fe8cf618f25

If you suspect that an Arc agent has been installed, you can thus grep for “azmagent” in the auth.log file. From the last log line here we have quite a lot of data that helps us with attribution.

  • Tenant-ID can help you identify the attacker’s Azure tenant. If you use the URL https://security.microsoft.com?tid=<tenant-id&gt; you may also get a logo if they have configured that.
  • You also get the resource group and the Azure location used by the attacker

Another way to find this installation is to have a look at the running services.

systemctl list-units | grep -i azure
azuremonitor-agentlauncher.service loaded active running   Azure Monitor Agent Launcher daemon (on systemd)
azuremonitor-coreagent.service loaded active running   Azure Monitor Agent CoreAgent daemon (on systemd) loaded active running   Azure Monitor Agent daemon (on systemd)
himdsd.service loaded active running   Azure Connected Machine Agent Service

The himdsd.service is the service running the Arc agent. Overview of the Azure Connected Machine agent – Azure Arc | Microsoft Learn. In the documentation for the Azure Arc agent, we learn that there are log files generated in multiple non-standard locations. Performing an SSH-based login with private key from Azure Cloud Shell, we find the following lines in the log /var/opt/azmagent/log/hidms.log:

time="2023-10-23T11:56:35Z" level=debug msg="Connect Agent: read incoming message"
time="2023-10-23T11:56:35Z" level=debug msg="Connect Agent: pushing event to subscriber on microsoft.guestgateway"
time="2023-10-23T11:56:35Z" level=debug msg="Loading AgentConfig file from: /var/opt/azcmagent/agentconfig.json"
time="2023-10-23T11:56:35Z" level=info msg="config defaults set: &{ServiceConfigurations:[{ServiceName:SSH Port:22}] LocalAllowedPorts:[] ConnectionsEnabled:true EstsEndPoint:https://login.microsoftonline.com GnsURI:https://guestnotificationservice.azure.com ServiceBusEndpoint:.servicebus.windows.net SkipSSLCheck:false Location:norwayeast HeartBeat:60 EndPoint:/var/opt/azcmagent/socks/notify.sock LogLevel:INFO ResourceId:/subscriptions/8a8c2495-4b8c-4282-a028-55a16ef96caa/resourceGroups/quicktalks/providers/Microsoft.HybridCompute/machines/scadajumper}"
time="2023-10-23T11:56:35Z" level=debug msg="Loading AgentConfig file from: /var/opt/azcmagent/agentconfig.json"
time="2023-10-23T11:56:35Z" level=debug msg="HIS host name: gbl.his.arc.azure.com, IPv4 address: 20.50.1.196"
time="2023-10-23T11:56:35Z" level=info msg="cloud endpoint: &{Name:AzureCloud ImdsName:AzurePublicCloud ARM:https://management.azure.com ActiveDirectory:https://login.windows.net IdentityService:his.arc.azure.com GlobalIdentityService:https://gbl.his.arc.azure.com GuestConfigEndpoint: EstsEndPoint:https://login.microsoftonline.com PasEndPoint:https://pas.windows.net GnsURL:https://guestnotificationservice.azure.com ServiceBusEndpoint:.servicebus.windows.net GuestConfig:https://agentserviceapi.guestconfiguration.azure.com EndpointsToCheck:map[https://agentserviceapi.guestconfiguration.azure.com:true https://gbl.his.arc.azure.com:true https://login.microsoftonline.com:false https://login.windows.net:false https://management.azure.com:false https://pas.windows.net:false] Portal:https://portal.azure.com ArmMetadata:{Portal: Authentication:{LoginEndpoint: Audiences:[] Tenant: IdentityProvider:} Media: GraphAudience: Graph: Name: Suffixes:map[] DataplaneEndpoints:map[] Batch: ResourceManager: VMImageAliasDoc: ActiveDirectoryDataLake: SQLManagement: MicrosoftGraphResourceId: AppInsightsResourceId: AppInsightsTelemetryChannelResourceId: AttestationResourceId: SynapseAnalyticsResourceId: LogAnalyticsResourceId: OssrDbmsResourceId:}}"time="2023-10-23T11:56:35Z" level=info msg="Connect Agent: checking to see if connection is allowed with remote control plane data"
time="2023-10-23T11:56:35Z" level=debug msg="Loading AgentConfig file from: /var/opt/azcmagent/agentconfig.json"time="2023-10-23T11:56:35Z" level=info msg="config defaults set: &{ServiceConfigurations:[{ServiceName:SSH Port:22}] LocalAllowedPorts:[] ConnectionsEnabled:true EstsEndPoint:https://login.microsoftonline.com GnsURI:https://guestnotificationservice.azure.com ServiceBusEndpoint:.servicebus.windows.net SkipSSLCheck:false Location:norwayeast HeartBeat:60 EndPoint:/var/opt/azcmagent/socks/notify.sock LogLevel:INFO ResourceId:/subscriptions/8a8c2495-4b8c-4282-a028-55a16ef96caa/resourceGroups/quicktalks/providers/Microsoft.HybridCompute/machines/scadajumper}"
time="2023-10-23T11:56:35Z" level=debug msg="Loading AgentConfig file from: /var/opt/azcmagent/agentconfig.json"
time="2023-10-23T11:56:35Z" level=debug msg="HIS host name: gbl.his.arc.azure.com, IPv4 address: 20.50.1.196"
time="2023-10-23T11:56:35Z" level=info msg="cloud endpoint: &{Name:AzureCloud ImdsName:AzurePublicCloud ARM:https://management.azure.com ActiveDirectory:https://login.windows.net IdentityService:his.arc.azure.com GlobalIdentityService:https://gbl.his.arc.azure.com GuestConfigEndpoint: EstsEndPoint:https://login.microsoftonline.com PasEndPoint:https://pas.windows.net GnsURL:https://guestnotificationservice.azure.com ServiceBusEndpoint:.servicebus.windows.net GuestConfig:https://agentserviceapi.guestconfiguration.azure.com EndpointsToCheck:map[https://agentserviceapi.guestconfiguration.azure.com:true https://gbl.his.arc.azure.com:true https://login.microsoftonline.com:false https://login.windows.net:false https://management.azure.com:false https://pas.windows.net:false] Portal:https://portal.azure.com ArmMetadata:{Portal: Authentication:{LoginEndpoint: Audiences:[] Tenant: IdentityProvider:} Media: GraphAudience: Graph: Name: Suffixes:map[] DataplaneEndpoints:map[] Batch: ResourceManager: VMImageAliasDoc: ActiveDirectoryDataLake: SQLManagement: MicrosoftGraphResourceId: AppInsightsResourceId: AppInsightsTelemetryChannelResourceId: AttestationResourceId: SynapseAnalyticsResourceId: LogAnalyticsResourceId: OssrDbmsResourceId:}}"
time="2023-10-23T11:56:35Z" level=debug msg="Connect Agent: gwa: processing ingress request for SSH:22"
time="2023-10-23T11:56:35Z" level=debug msg="Connect Agent: Opened hc: a71fac9f-68a5-407b-be67-1370e650d34a, wsAddress: wss://g10-prod-am3-010-sb.servicebus.windows.net/$hc/microsoft.hybridcompute/machines/3ced11256d4ee0afd485e76e1b6ce6b287a684cb4d040e329c13529bc153d8c7/1698062195064991744/v2?sb-hc-action=accept&sb-hc-id=71bd5a85-f3d0-4636-8cbe-c7c73d2ec962_G10_G4, localConnection: {serviceName:SSH port:localhost:22 checkAllowedLocally:false}"
time="2023-10-23T11:56:35Z" level=debug msg="Connect Agent: Successfully added listener for conID: a71fac9f-68a5-407b-be67-1370e650d34a, target: localhost:22"

This log contains quite a lot of interesting inforamtion. If you want to search the log file for interesting events, grepping for “Connect Agent” is a good start.

Arc Agent on Windows server

When we try the same thing on Windows, it is a bit more obvious in sign-in events, because the authentication using the agent still generates Event ID 4624, and also shows SSH as the sign-in process.

windows event log message

In this case, we created a new username “hacker”, and used this to log in from Azure Arc in the portal, using hte Azure cloud shell. We see that the Logon Process is reported as sshd. On Windows this is easier to discover, as SSH is not commonly used for remote access. In fact, the SSH server is not installed by default, so we had to install it first, to make this technique work for remote access.

Also, when being logged in with GUI access, the Azure Arc agent will stand out both in the Start menu after being installed and in the list of installed applications. This test was run on a Windows Server 2022 running on an EC2 instance in AWS.

Apps and features on Windows, showing Azure Connected Machine Aget.

If you are not using Azure Arc yourself, and you see the “Azure Connected Machine Agent” among installed apps, there is reason to investigate further!

In summary

In summary, using Azure Arc as a persistence vector is interesting. On Linux it is more stealthy than on Windows, largely because of the localhost reference seen in the last log, whereas on Windows Event ID 4624 with sshd as logon process is typically reason to be skeptical.

The technique, when used as shown here, will leave traces of the Azure tenant ID and subscription ID, which can be used for attribution. On Linux it is interesting to note that the most useful log data will not be found in the /var/log folder, but in /var/opt/azmagent/log instead, a location where most defenders would quite likely not look for bad omens.

Edge history forensics – part 2 (downloads and search)

I have not been feeling well the last few days, and taken some sick days. The upside of that is time on the coach researching stuff on my laptop without needing to be “productive”. Yesterday I did a dive into the History file in Edge, looking at how URL’s and browser history is saved. Today I decided to continue that expedition a bit, to look into the downloads history, as well as search terms typed into the address bar.

Downloads – when did they happen?

Sometimes you would like to investigate which files have been downloaded on a computer. A natural way to do this is to look in the downloads folder of the user. However, if the files have been deleted from that folder, it may not be so easy to figure out what has happened. A typical malware infection could be to trick someone into downloading a malicious file and then executing it.

We found a suspicious file - and we believe a search led to this one.

If we again turn to the History file of Edge, we can check out the downloads table. It has a lot of fields, but some of the interesting ones are:

  • id
  • target_path
  • start_time
  • tab_url

Immediately interesting property for forensics investigations is that we can check with start_time when the download occurred. We also have access to the URL of the download, from tab_url, as well as where it was linked from.

To test how well this works, I am going to download a file to a non-standard location.

select id, tab_url, target_path, datetime(start_time/1000000 + (strftime('%s','1601-01-01')),'unixepoch','localtime') from downloads;

The result is:

6|https://snabelen.no/deck/@eselet/111257537583580387|C:\Users\hakdo\Documents\temp\HubSpot 2023 Sustainability Report_FINAL.pdf|2023-10-18 20:55:16

This means that I downloaded the file from a Mastodon post link, but this is not the origin of the file.

Private mastodon post used as example of link to a file that can be downloaded

It seems we are able to get the actual download URL from the downloads_url_chain table. This table seems to have the same id as the downloads table.

sqlite> select id, tab_url from downloads where id=6;

6|https://snabelen.no/deck/@eselet/111257537583580387

sqlite> select * from downloads_url_chains where id=6;

6|0|https://www.hubspot.com/hubfs/HubSpot%202023%20Sustainability%20Report_FINAL.pdf

Then we have the full download link.

In other words, we can based on these tables get:

  • When the download occurred
  • Where it was stored on the computer
  • What page the link was clicked on
  • What the URL of the downloaded file was

That is quite useful!

Searches typed into the address bar

The next topic we look at is the table keyword_search_terms. This seems to be the keywords typed into the address bar of the Edge browser to search for things. The schema shows two column names of particular interest: url_id, term. The url_id only gives us the ID from the urls table, so we need to use an inner join here to find the actual search string. Here’s an example:

sqlite> select term, url_id, url from keyword_search_terms inner join urls on urls.id=keyword_search_terms.url_id order by id desc limit 1;

The result is:

site:hubspot.com filetype:pdf|801|https://www.bing.com/search?q=site%3Ahubspot.com+filetype%3Apdf&cvid=1357bb7a2e544bb2bda6d557120ccf8c&gs_lcrp=EgZjaHJvbWUyBggAEEUYOTIGCAEQRRg60gEJMjIzNjdqMGo5qAIAsAIA&FORM=ANAB01&PC=ACTS

Going through someone’s search terms is of course quite invasive, and we should only do that when properly justified and with a sound legal basis. Here are some situations where I think this could be helpful and acceptable:

  • There has been an insider incident, and you are investigating the workstation used by the insider. Probably still will require that the end user is informed, perhaps also concent, depending on the legal requirements at your location
  • An endpoint was compromised through a malicious download, and the link to the download came from a search engine. The attacker may have used malicious search engine optimization to plant malicious links on a search engine page

Here’s a potential case where you may want to have a look at the search terms. A user downloaded a malicious document and executed it. When investigating, you found out that the link came from a search engine result page. You would like to check the searches done that led to this page, as the malware may have been targeting specific searches to your business or business sector.

For the sake of the example I now changed the default search engine in Edge from Bing to Duckduckgo. Then I did a search and downloaded a PDF file directly from the search results. Using an SQL search to find the latest download we get:

sqlite> select id, tab_url, target_path, referrer from downloads order by id desc limit 1;
8|https://duckduckgo.com/?q=evil+donkey+filetype%3Apdf&ia=web|C:\Users\hakdo\Documents\temp\fables-2lwslmm (1).pdf|https://duckduckgo.com/

Then we may want to know where this file came from, and again we turn to the downloads_url_chains table:

select * from downloads_url_chains where id=8;
8|0|https://cpb-us-w2.wpmucdn.com/blogs.egusd.net/dist/e/211/files/2012/07/fables-2lwslmm.pdf

Now we know already here what has been downloaded. We can also see from the query string above what the search terms were (“evil donkey” and “filetype:pdf”). If we have reason to believe that the attacker has poisoned results relating to evil donkey searches, we may want to look at the searches done by the user.

sqlite> select * from keyword_search_terms where term like '%donkey%';

5|819|evil donkey filetype:pdf|evil donkey filetype:pdf

5|820|evil donkey filetype:pdf|evil donkey filetype:pdf

That is one specific search – if searching for “evil donkeys” is something that this company could be expected to do, but would in general be very unusual (I suspect it its), this could be an initial delivery vector using malicious SEO.

Note that the default behavior in Edge is to open a PDF directly in the browser, not to download it. In this case, the search engine URL would not show up as referrer in the downloads record, but the direct link to the document on the Internet.

The second column in the result above is a reference to the ID in the urls table, so more information about the search performed (including time it was executed) can be found there. For example, if we want to know exactly when the user searched for evil donkeys, we can ask the urls table for this information.

select datetime(last_visit_time/1000000 + (strftime('%s','1601-01-01')),'unixepoch','localtime') from urls where id=819;

The answer is that this search was executed at:

2023-10-19 08:31:28

I hope you enjoyed that little browser History file dissection – I know a lot more about how Edge manages browser history data now at least.

Edge browser history forensics

Note that there are forensics tools that will make browser history forensics easy to do. This is mostly for learning, but for real incident handling and forensics using an established tool will be a much faster route to results!

Basics

The edge browser history is stored in a sqlite3 database under each user profile. You find this database as C:\Users\<username>\AppData\Local\Microsoft\Edge\User Data\Default\History

The “History” file is a sqlite3 database, and you can analyse the database using the sqlite3 shell utility, that can be downloaded from here: SQLite Download Page.

If we list the tables in the database, we see there are quite a few.

screeshot terminal showing tables of HIstory sqlite3 database

Several of these seem quite interesting. The “urls” table seems to contain all the visited URL’s that exist in the browser history. Looking at the schema of this table shows that we can also here see the “last visited” timestamp, which can be useful.

sqlite> .schema urls
CREATE TABLE urls(id INTEGER PRIMARY KEY AUTOINCREMENT,url LONGVARCHAR,title LONGVARCHAR,visit_count INTEGER DEFAULT 0 NOT NULL,typed_count INTEGER DEFAULT 0 NOT NULL,last_visit_time INTEGER NOT NULL,hidden INTEGER DEFAULT 0 NOT NULL);
CREATE INDEX urls_url_index ON urls (url);

It can also be interesting to check out the visit_count.  For example, in the history file I am looking at, the top 3 visited URL’s are:

sqlite> select url, visit_count from urls order by visit_count desc limit 3;

https://www.linkedin.com/|24

https://www.linkedin.com/feed/|15

https://www.vg.no/|14

Another table that is interesting is, “visits”. This table has the following fields (among many, use .schema to inspect the full set of columns):

  • url
  • visit_time
  • visit_duration

The visits table contains mostly references to other tables:

sqlite> select * from visits where id=1;

1|1|13341690141373445|0||805306368|0|0|0|0||0|0|0|0|1|

To get more useful data out of this, we need to use some join queries. For example, if I would like to know which URL was last visited I could do this:

select visit_time, urls.url from visits inner join urls on urls.id = visits.url order by visit_time desc limit 1;

13342089225183294|https://docs.python.org/3/library/sqlite3.html

The time stamp is not very reader friendly, and it appears to be the number of microseconds since midnight January 1, 1601. sqlite – What is the format of Chrome’s timestamps? – Stack Overflow. This value has the same basis, but different counting from than Windows File Time File Times – Win32 apps | Microsoft Learn.

So.. at what times did I visit the Python docs page? The good news is that sqlite3 contains a datetime function that allows us to convert to human readable form directly in the query:

sqlite> SELECT
   ...>   datetime(visit_time / 1000000 + (strftime('%s', '1601-01-01')), 'unixepoch', 'localtime'), urls.url
   ...> FROM visits
   ...> INNER JOIN urls
   ...>   ON urls.id = visits.url
   ...> WHERE
   ...>   urls.url LIKE '%python.org%'
   ...> ORDER BY visit_time DESC
   ...> LIMIT 3;

2023-10-18 09:53:45|https://docs.python.org/3/library/sqlite3.html

2023-10-17 10:01:54|https://docs.python.org/3/library/subprocess.html

2023-10-17 09:58:51|https://docs.python.org/3/library/subprocess.html

Making some scripts

Typing all of this into the shell can be a bit tedious and difficult to remember. It could be handy to have a script to help with some of these queries. During incident handling, there are some typical questions about web browsing that tend to show up:

  1. When did the user click the phishing link?
  2. What files were downloaded?
  3. What was the origin of the link?

If we now try to make a small Python utility to figure out when a link has been visited, this could be a useful little tool. We concentrate on the first of the questions above for now – we have a URL, and want to check if it has been visited, and what the last visit time was.

Such a script can be found here: cbtools/phishtime.py at main · hakdo/cbtools (github.com).

Phishing investigation

Consider a hypothetical case, where we know that a user has visited a phishing link from his home computer, and that this led to a compromise, that later moved into the corporate environment. The user has been so friendly as to allow us to review his Edge history database.

We know from investigation of other similar cases that payloads are often sent with links to Pastebin content. We therefore want to search for “pastebin.com” in the URL history.

We copy over the History file to an evidence folder before working on it (to make sure we don’t cause any problems for the browser). It is a good idea to document the evidence capture, with a hash, timestamp, who did it etc.

Then we run our little Python script, looking for Pastebin references in the urls table. The command we use is

python phishtime.py History pastebin.com 2

The result of the query gives us two informative lines:

2023-10-18 12:42:37  hxxps://pastebin.com/raw/k3NjT2Cp

2023-10-18 12:42:37  hxxps://www.google.com/url?q=https://pastebin.com/raw/k3NjT2Cp&source=gmail&ust=1697712137533000&usg=AOvVaw1TK8-pr8-7Xsp8BG72hbP5

From this we quickly conclude that there was a Pastebin link provided, and that the user clicked this phishing link from his Gmail account.

Cyber incident response training with Azure Labs

I have been planning an internal incident response training at work, and was considering how to create environments for participants to work on. At first I was planning to create some VM’s, a virtual network, etc., and export a template for easy deployment by each participant. The downside of this, is complexity. Not everyone is equally skilled with cloud tech, and it can also be hard to monitor how the participants are doing.

While planning this I came across Azure Labs. This is a setup to create temporary environments for training, replicated to multiple users. Looks perfect! I started by creating a lab, only to discover that it did need a bit more of config to get it working.

The scenario is this: a Windows machine works as an engineering workstation in a network. A laptop in the office network is compromised. RDP from the office network to the OT network is allowed, and the attacker runs an nmap scan for host discovery after compromising the office host, and then uses a brute-force attack to get onto the engineering workstation. On that machine the attacker establishes persistence, and edits some important config files. The participants will work as responders, and will perform analysis on the compromised engineering workstation. They should not have access to the office computer.

The first lab I created by just clicking through the obvious things, with default settings. Then I got a Windows 11 VM, but it had no internal network connectivity. After searching for a way to add a subnet to the lab, I found this article: Create lab with advanced networking. The summary notes are as follows:

  • Create a new resource group
  • Create a Vnet + subnet
  • Create a network security group
  • Associate the subnet with Azure labs
  • Create a new lab plan and choose “advanced networking”
  • Ready to create new labs!

With all this in place we could create a new lab. We need to choose to customize the VM to prepare the forensic evidence. We can run it as a template, and install things on it, do things to it, before we publish it to use in a training. This way we will have disk, memory and log artifacts ready to go.

If we want ping to work (and we do), we also need to change the Windows firewall settings on the VM, because Azure VM’s block pings by default. Blog post with details here. Tl;dr:

# For IPv4
netsh advfirewall firewall add rule name="ICMP Allow incoming V4 echo request" protocol="icmpv4:8,any" dir=in action=allow

netsh advfirewall firewall add rule name="ICMP Allow outgoing V4 echo request" protocol="icmpv4:8,any" dir=out action=allow
 

If you want to allow ping to/from the Internet, you will also have to allow that in the network security group. I don’t need that for my lab, so I didn’t do that.

We also needed an attacker. For this we created a new VM in Azure the normal way, in the same resource group used for the lab, and associating it to the same Vnet. From this attacker, we can run nmap, brute-force attacks, etc.

Then our lab is ready to publish, and we can just wait for our training event to start. Will it be a success? Time will show!

Create a Google Site with a section requiring authentication with Forms, Sheets & App Script

If you Google “how to add login to a Google Site” you get many hits for questions and few answers. I wondered if we could somehow create a Google Site with access control for a “member’s area”. Turns out, you can’t really do that. We can, however, simulate that behavior by creating two sites, where one contains the “public pages” and another one the “private pages”.

First, we create a site that we want to be public. Here’s an example of a published Google Site: https://sites.google.com/view/donkeytest/start. We publish this one as visible for everyone.

Publish dialog (in Norwegian) – showing access for all for our public page.

Now, create a folder to contain another site, which will be your membership site.

Membership site in its own folder

This one is published only to “specific persons”. These people will need to have Google accounts to access the membership site. Now, we can add new users by using the sharing functions in Google Drive, but we want it to be a bit more automated. This is the reason we put the site in its own folder.

Google used to have a version of Google Sites that could be scripted, but that version is now considered legacy. There is a new version of Google Sites that we are using but that one cannot be scripted. However, we can manipulate permissions for a folder in Google Drive using App Script, and permissions are hierarchical.

Let’s assume our users have received an access code that grants them access to the site, for example in a purchase process. We can create a Google Form for people to get access after obtaining this code. They will have to add their Gmail address + the secret access code.

Signup form for our membership page (also in Norwegian, tilgangskode = access code)

When the user submits this form, we need to process it and grant access to the parent folder of our membership site. First, make sure you go into the answers section, and click the “Google Sheet” symbol to create a Sheet for containing the signups.

Click the green Sheet symbol to create a Google Sheet to hold signup answers.

In Sheets, we create two extra tabs – one for the “secret access code”, and another for a block list in case there are users we want to deny signing up. To make the data from the spreadsheet accessible to Google App Script, we now click the Google App Script link on the Extensions menu in the Google Sheet.

Go to App Script!

In App Script, we add the Sheets + Gmail services. We create a function to be triggered each time the form is submitted. Our function is called onFormSubmit. We click the “trigger button” in the editor to add a trigger to make this happen.

Trigger button looks like a clock!

In the trigger config, choose trigger source to be “spreadsheet”, and event type to “form submission”. Now the trigger is done, and it is time to write some code. In pseudocode form, this is what needs to happen:

  • Get the e-mail address of the new user + the access code submitted by the user
  • Check if the access code is correct
    • If correct, check if the user is on a block list. If the user is not blocked, grant access to the parent folder of the membership site using the Google Drive service. Send an e-mail to the user that access has been granted.
    • If incorrect, don’t grant access. Perhaps log the event

The App Script code is just JavaScript. Here’s our implementation.

function onFormSubmit(event) {
  var useremail = event.values[1]
  var accesscode = event.values[2]
  var correctcode = sheetTest()
  var blocked = getBlockedUsers()
  console.log(blocked)
  if (accesscode == correctcode) {
    if (blocked.flat().includes(useremail)) {
      Logger.log("Blocked user is attempting access: " + useremail)
    } else {
      Logger.log("Provide user with access: " + useremail)
      var secretfolder = DriveApp.getFolderById("<id-of-folder>")
      secretfolder.addViewer(useremail)
      GmailApp.sendEmail(useremail, "Access to Membership Site", "Body text for email goes here...")
    }
  } else {
    Logger.log("Deny user access")
  }
}

function sheetTest() {
  var sheet = SpreadsheetApp.openById("<Spreadsheet-ID>");
  var thiscell = sheet.getSheets()[1].getDataRange().getValues()
  var correctcode = thiscell[thiscell.length-1][0];
  return correctcode
}

function getBlockedUsers() {
  var sheet = SpreadsheetApp.openById("<Spreadsheet-ID>");
  var blocklist = sheet.getSheets()[2].getDataRange().getValues()
  return blocklist
}

Now, we are done with the “backend”. We can now create links in the navigation menus between the public site and the membership one, and you will have a functioning Google Site with a membership area as seen from the user’s point of view.